
Watch GitLab work
Connect GitLab when an agent should respond in issues and merge requests. GitLab tells AgentX about new activity through a webhook: a message GitLab sends to an address you give it every time something happens in a project. An agent replies when a comment @-mentions it.
Start with a test project. Give AgentX the smallest access that lets it do the job.
1. Create a GitLab token
- Browser, in GitLab: open your user settings and create a personal access token with the
apiscope. Use a dedicated GitLab user for the agent if you can. - Copy the token. Treat it like a password.
- On the AgentX machine, open the
.envfile next toagentx.json. - Add a line with the token, then save the file:sh
GITLAB_TOKEN=paste-the-token-here
2. Connect GitLab in AgentX
- Browser: open the dashboard and select Settings.
- Select the Channels tab.
- Select the GitLab card.
- Under Host, enter your GitLab address, such as
https://gitlab.comor your own GitLab server. - Under Admin token env-var, enter
GITLAB_TOKEN(the name of the line you added, not the token itself). - Leave Webhook listen port at
18810unless that port is taken. - Select Connect.
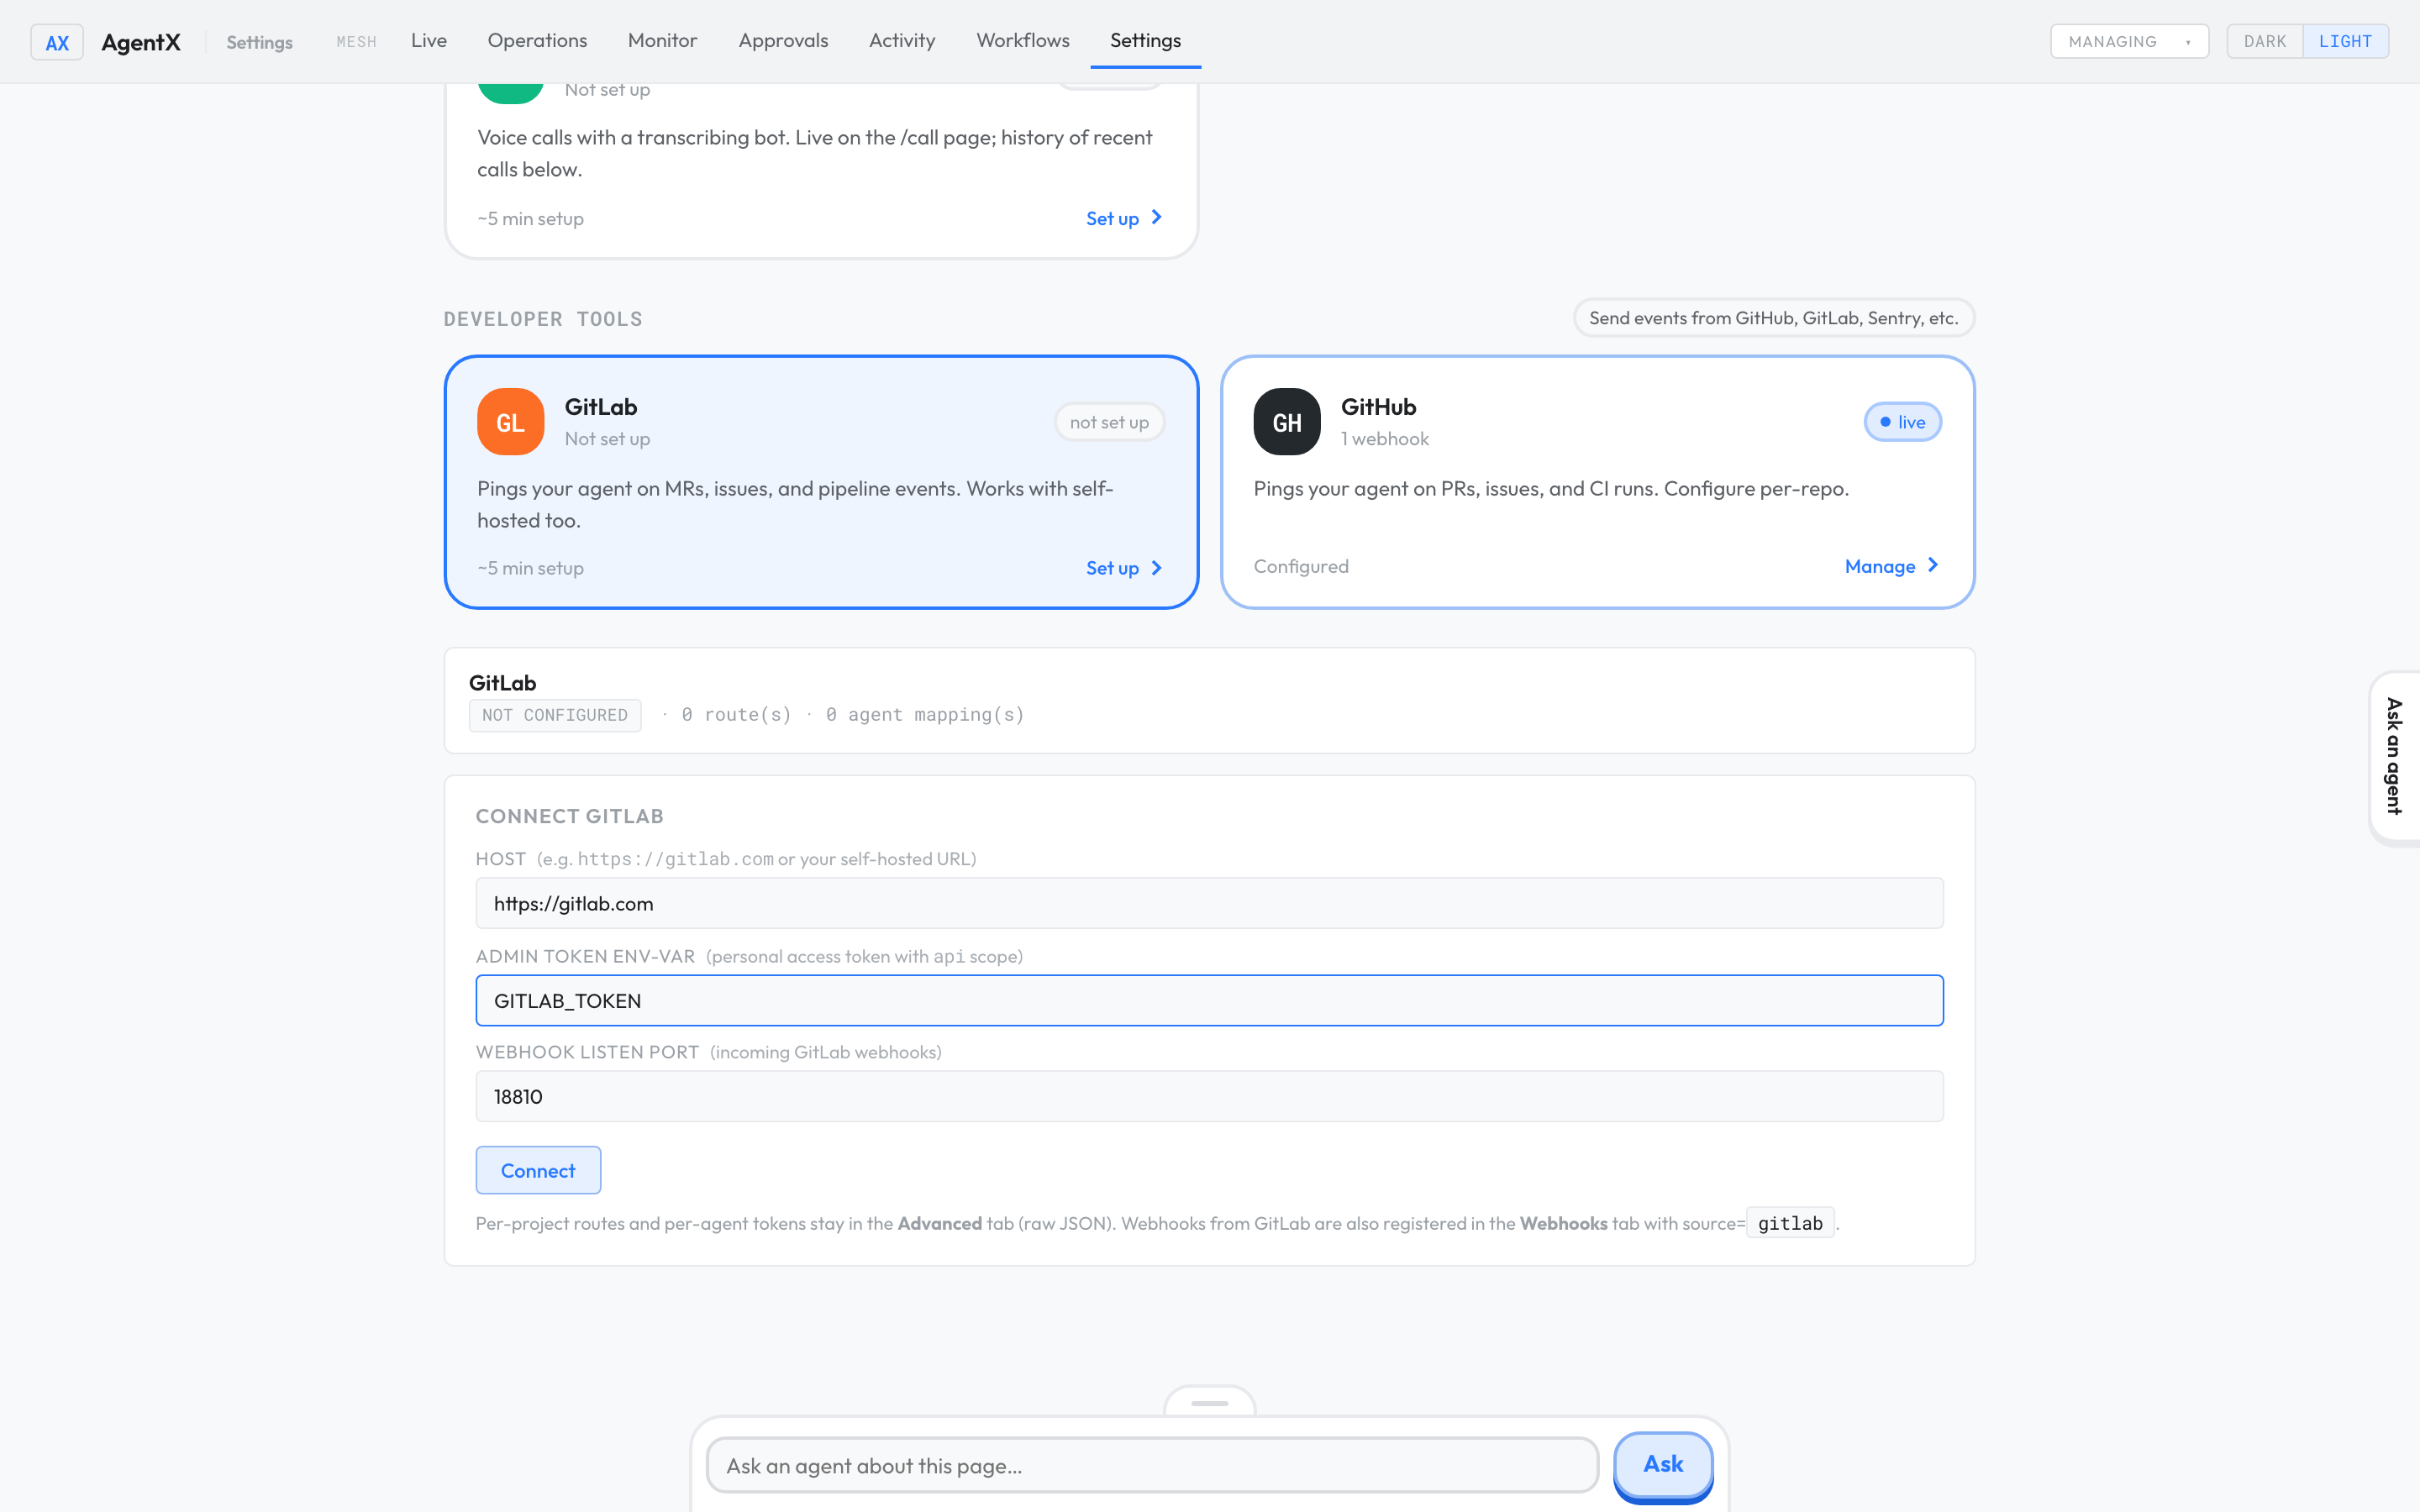
GitLab sends events to that port on the AgentX machine, not to the dashboard. GitLab must be able to reach it, for example over a private network (see Tailscale setup). Don't open it to the whole internet without a secret (step 3.6 below).
By default, each agent answers to the GitLab username that matches its agent ID. To map other usernames or give each agent its own token, edit channels.gitlab.agentMappings in Settings › Advanced.
If your team names its GitLab bot accounts with a common prefix, for example team-reviewer for the agent reviewer, set it once instead of mapping every agent: add "agentUsernamePrefixes": ["team-"] under channels.gitlab. Each agent then also answers to @team-<agent-id>.
3. Add the webhook in GitLab
- Browser, in GitLab: open the test project.
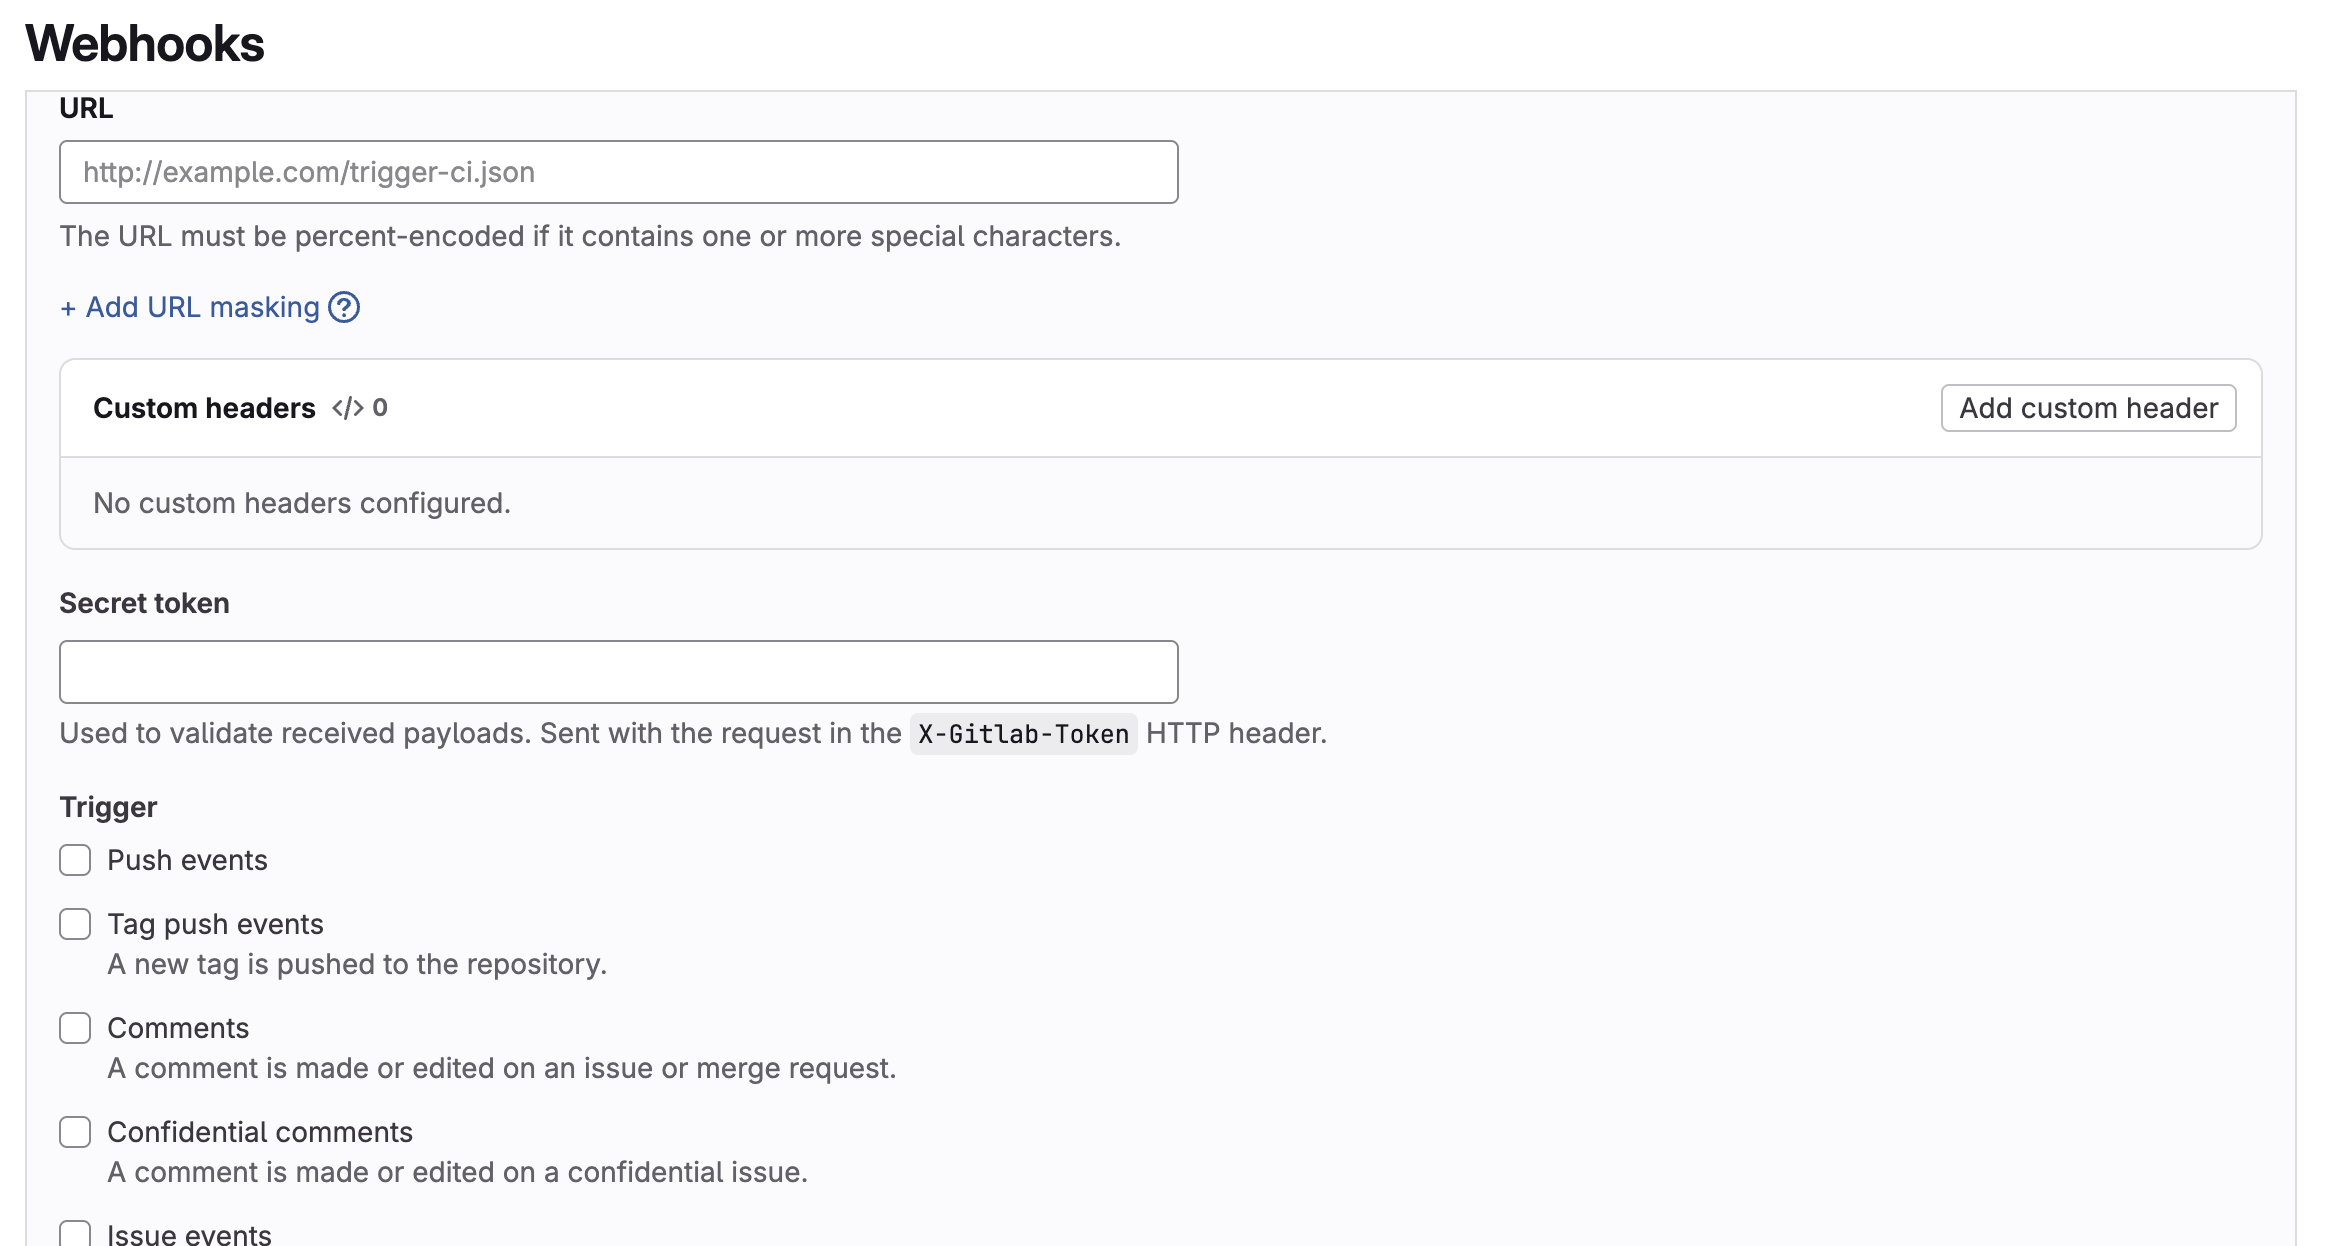
- Open Settings › Webhooks.
- Select Add new webhook.
- Under URL, enter the AgentX machine's address and the webhook port, for example
http://agentx.example.internal:18810/. - Tick Comments, Issues events and Merge request events. Add Pipeline events if the agent should see pipelines.
- Optional: under Secret token, enter a long random value. Then, in AgentX, add
"webhookSecret": "<the same value>"tochannels.gitlabin Settings › Advanced, and select Save. AgentX then refuses events without it. - Select Add webhook.
Check it worked
- Browser, in GitLab: on the webhook, select Test › Issues events. GitLab shows
HTTP 200. - Browser, in GitLab: in a test issue, add a comment that @-mentions the agent's GitLab username.
- Within a minute or two, the agent replies in the issue.
- Browser, in AgentX: open Activity. The request appears under the agent.
If something is wrong
- GitLab shows a connection error: GitLab can't reach the AgentX machine on port
18810. Check the address, the port and any firewall. - GitLab shows
401: the Secret token in GitLab doesn't matchwebhookSecretin AgentX. - GitLab shows
200but nothing happens: the comment has no @-mention, or it mentions a username no agent answers to. CheckagentMappings. - The agent runs but never posts a reply: the token in
.envis missing, revoked, or belongs to a user without access to the project. Checkagentx daemon logsforGitLab API error. - Still stuck: follow It's not answering.